How to apply new handlebar tape to my bike
By: Tijmen Smit
The handlebar tape on your road bike can get damaged over time. It is therefore important to replace it regularly. But how do you actually apply a new handlebar tape to your bike? In this article, we explain step by step how to do it.
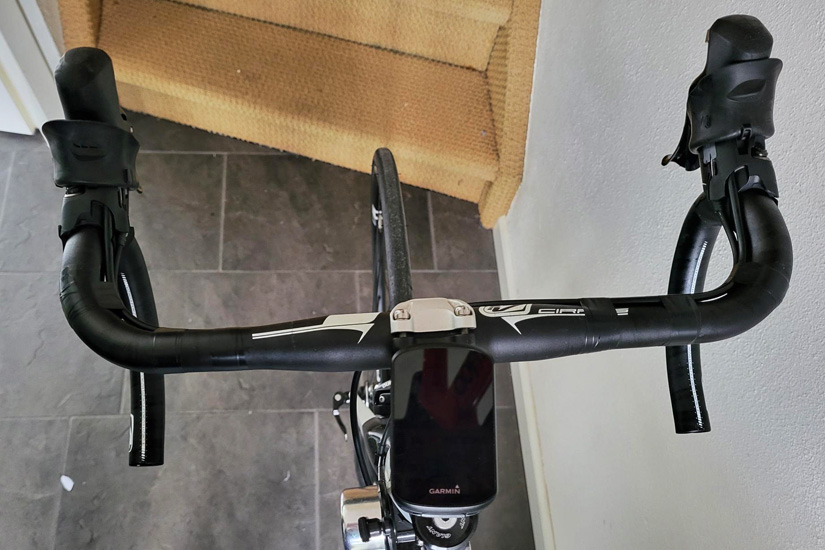
Step 1: Remove the old handlebar tape
Before you start fitting a new handlebar ribbon, you should first remove the old ribbon. You can do this by loosening the ends of the ribbon. Often these are attached with tape or clips. Once the ribbon is completely loose, you can carefully remove it from the handlebars.
Photo: Lizard Skins handlebar tape | by Tijmen Smit
Step 2: Clean the handlebar
Now that the old ribbon has been removed, it is time to clean the handlebar. Make sure to remove any leftover glue or tape so that the new ribbon adheres well. And make sure everything is thoroughly dry before continuing.
Step 3: Cover cables with tape
If you want to handle the cables under the tape, now tape them to the handlebars and slide up the rubbers around the shifters, so you can put them back over the handlebar tape later.
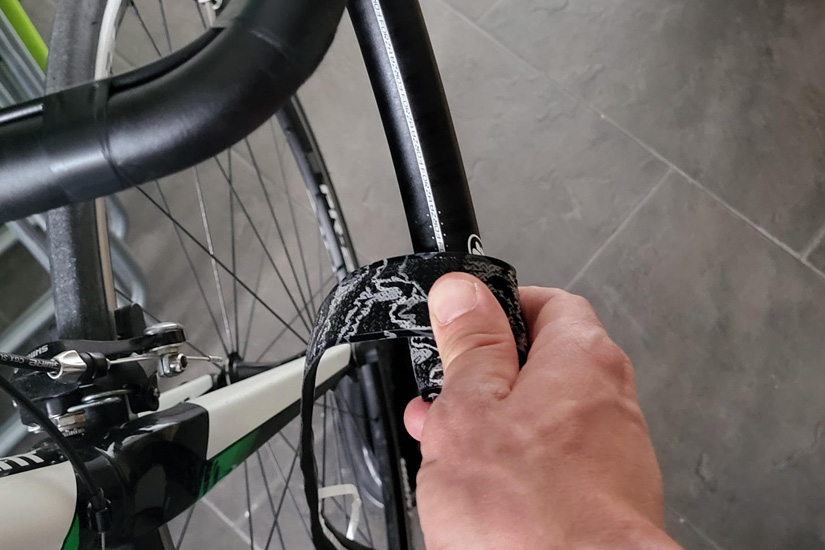
Step 4: Stick the small piece of tape behind the shifters
To avoid dropping a hole under the shifters, I stick the small piece of tape provided behind them.
Photo: Lizard Skins handlebar tape | by Tijmen Smit
Step 5: Ready to start
Start at the bottom of the handlebars and leave a piece of handlebar tape sticking out so that at the end you can put the bar-ends on them so that it is nicely finished. The direction of rotation is inwards. Pull the bar tape tight, but not too tight so the bar tape cannot break.
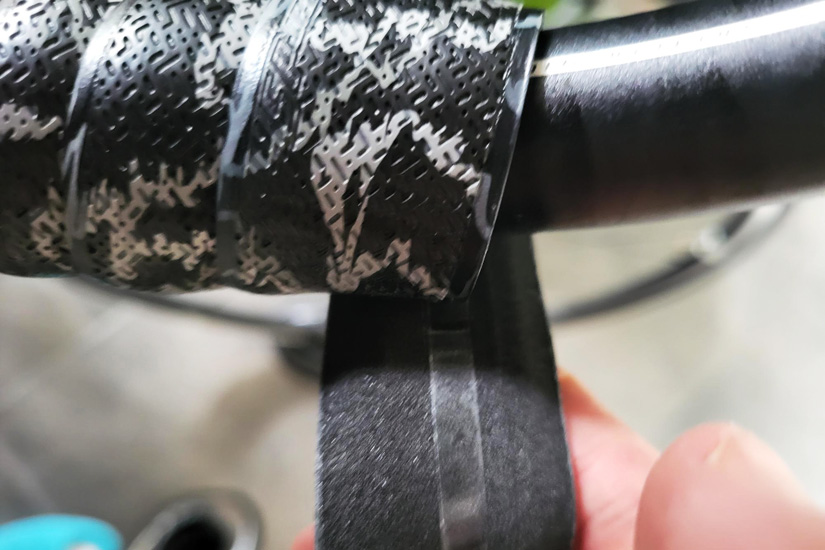
Step 6: Wrap it neatly
Make sure the sticky edge touches the end of the previous wrap. Try to wrap the handlebar tape so that there are no creases or folds and everything stays neatly straight.
Photo: Lizard Skins handlebar tape | by Tijmen Smit
Step 7: Double wrap around the shifters
Wrap backwards to the top, then backwards to the front again. From the front again back to the top so that everything is firmly in place. Then you can continue with the second part. In between, check that you have also wrapped everything under the handlebars.
Step 8: Cutting the handlebar tape
Decide how far you want the bar tape to go and cut it at an angle so that the end sits straight on your handlebars.
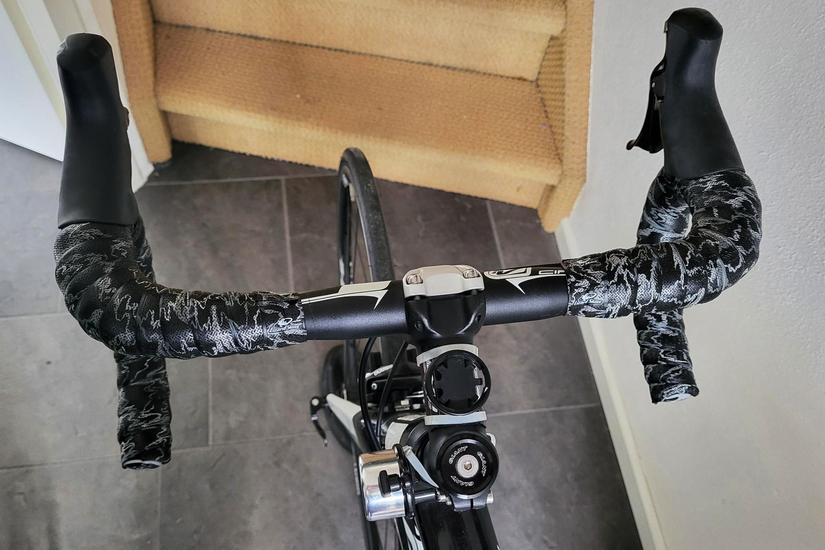
Step 9: Tape off the end of the bar tape
Finally, tape off the handlebar tape with the tape provided so that it has a nice finish. Then fit the bar-ends and you're done!
Now everything is ready! You've successfully applied a new handlebar tape to your road bike. Test everything out, make sure everything is tight and enjoy your new look while cycling! It's still a tricky job but stay calm, watch what you're doing and, above all, don't rush yourself.